1. How to Reserve Tables or Rooms & Assign Staff
The “Table” function allows staff to assign orders to specific tables or rooms.
This is useful for businesses offering table or room service, helping track which table/room ordered which items and ensuring correct delivery.
Users can start a bill via the new Table Layout. Example: In a restaurant, customers dine at a table; staff select the table layout and update it as new items are ordered.
2. Create a New Table via Back Office
Steps:
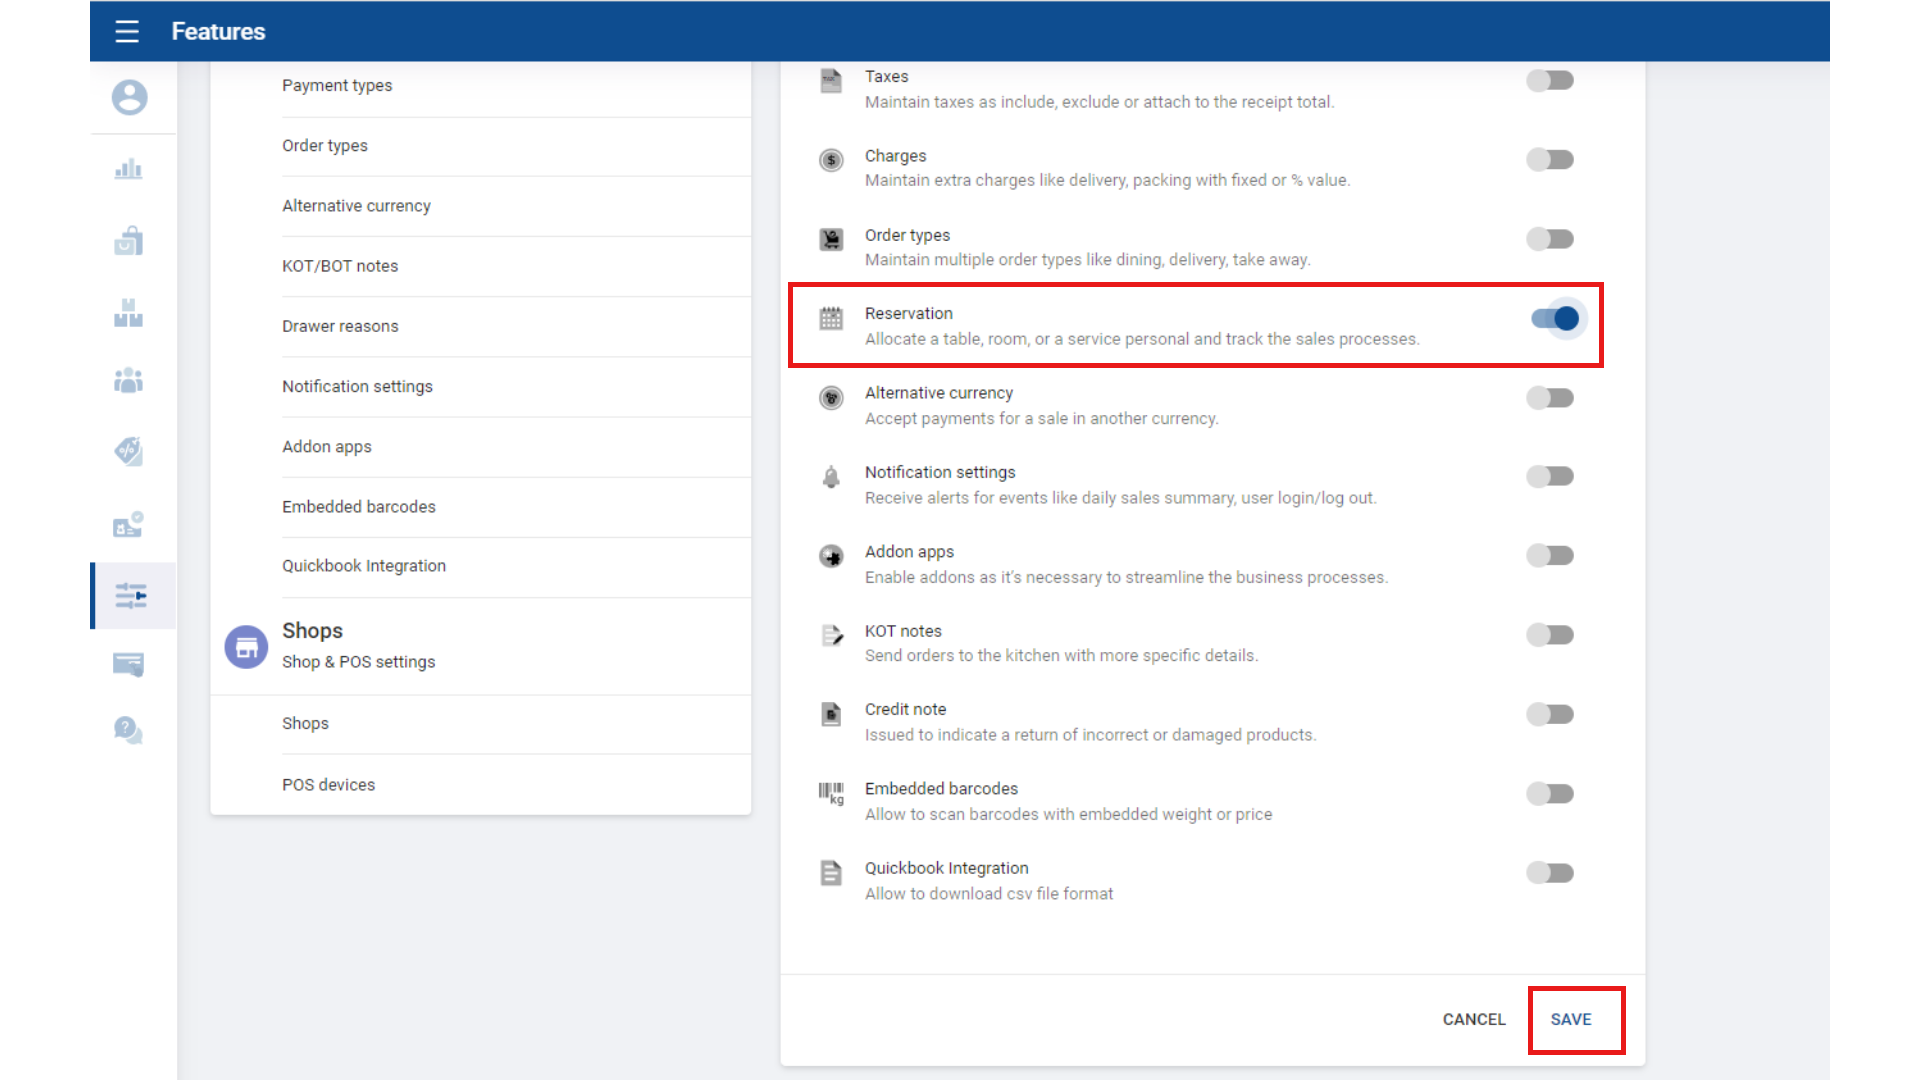
- Login to POS Back Office Webportal
- Select “Settings” from the main menu
- Go to “Feature”
- Turn ON “Reservations”
- Click “Save”
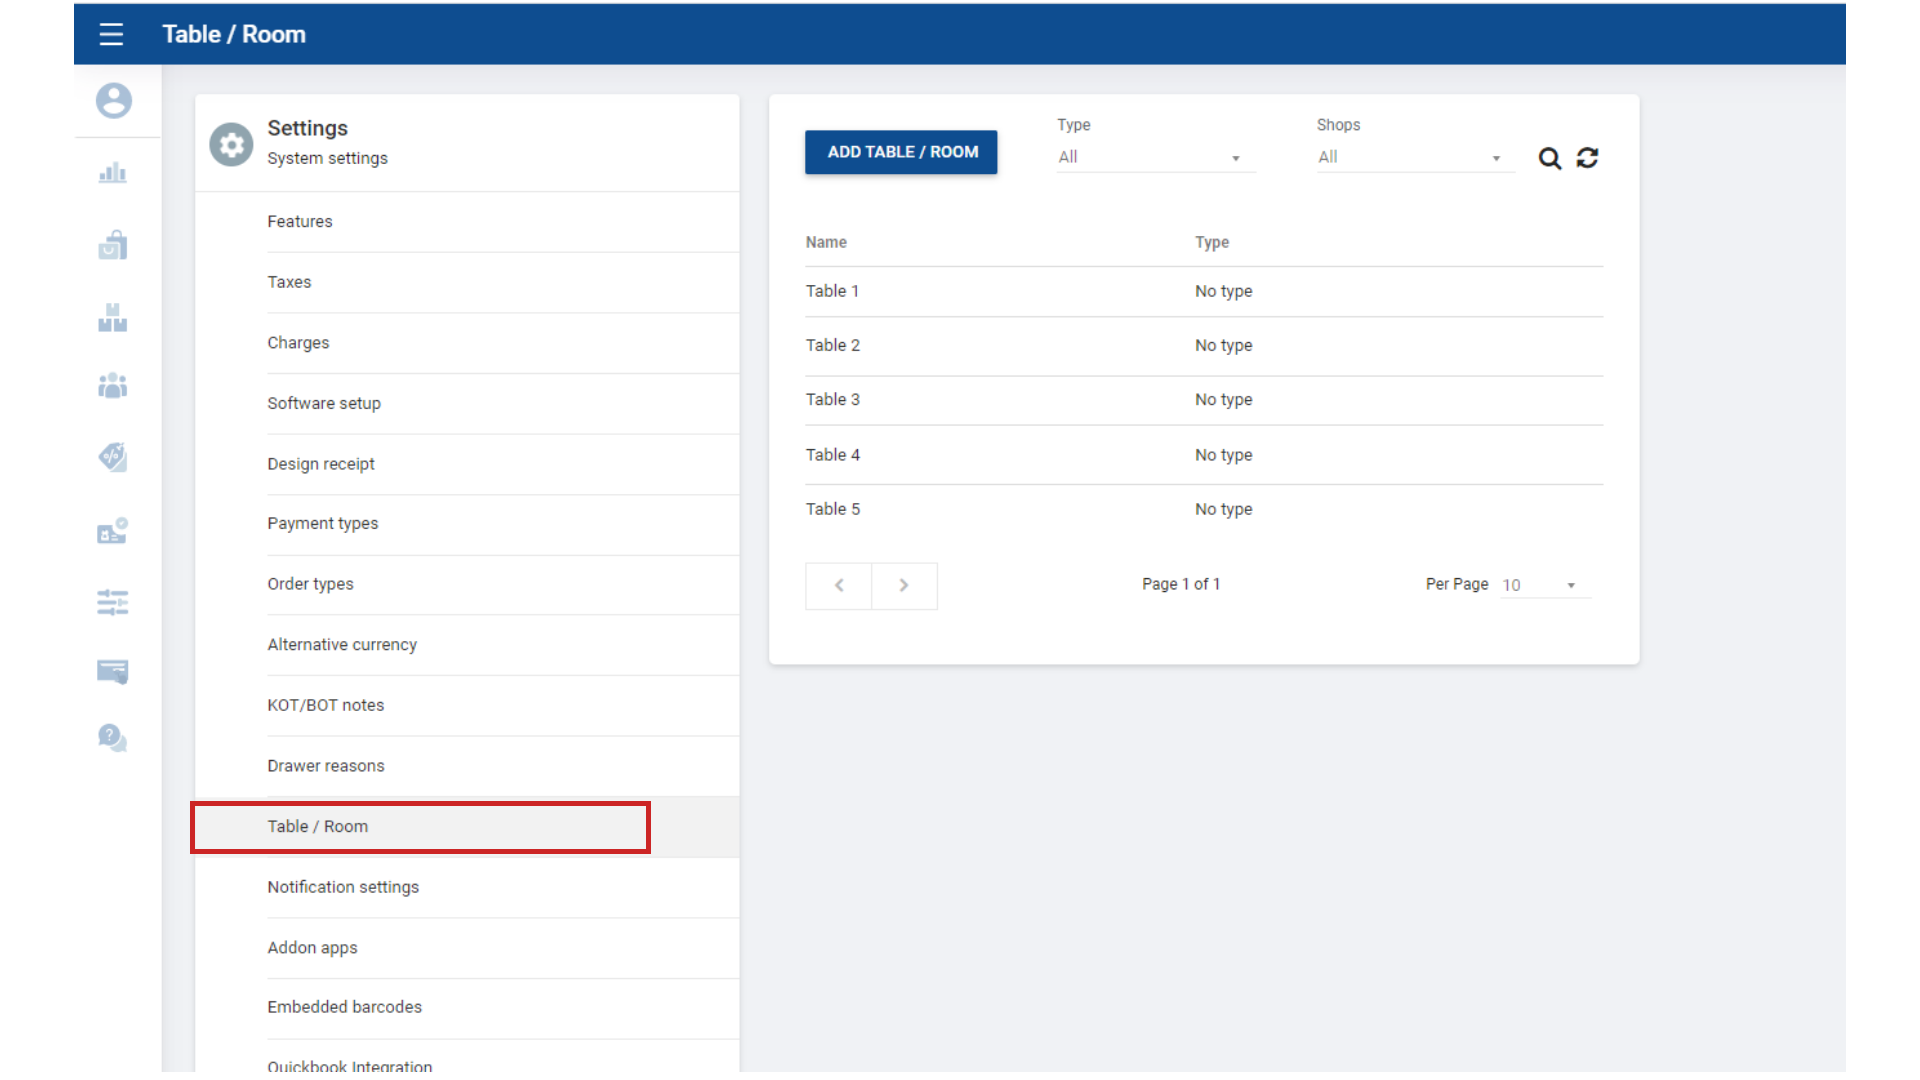
Once Reservations is ON, “Table / Room” appears as a sub-menu in Settings.
3. Add Table / Room
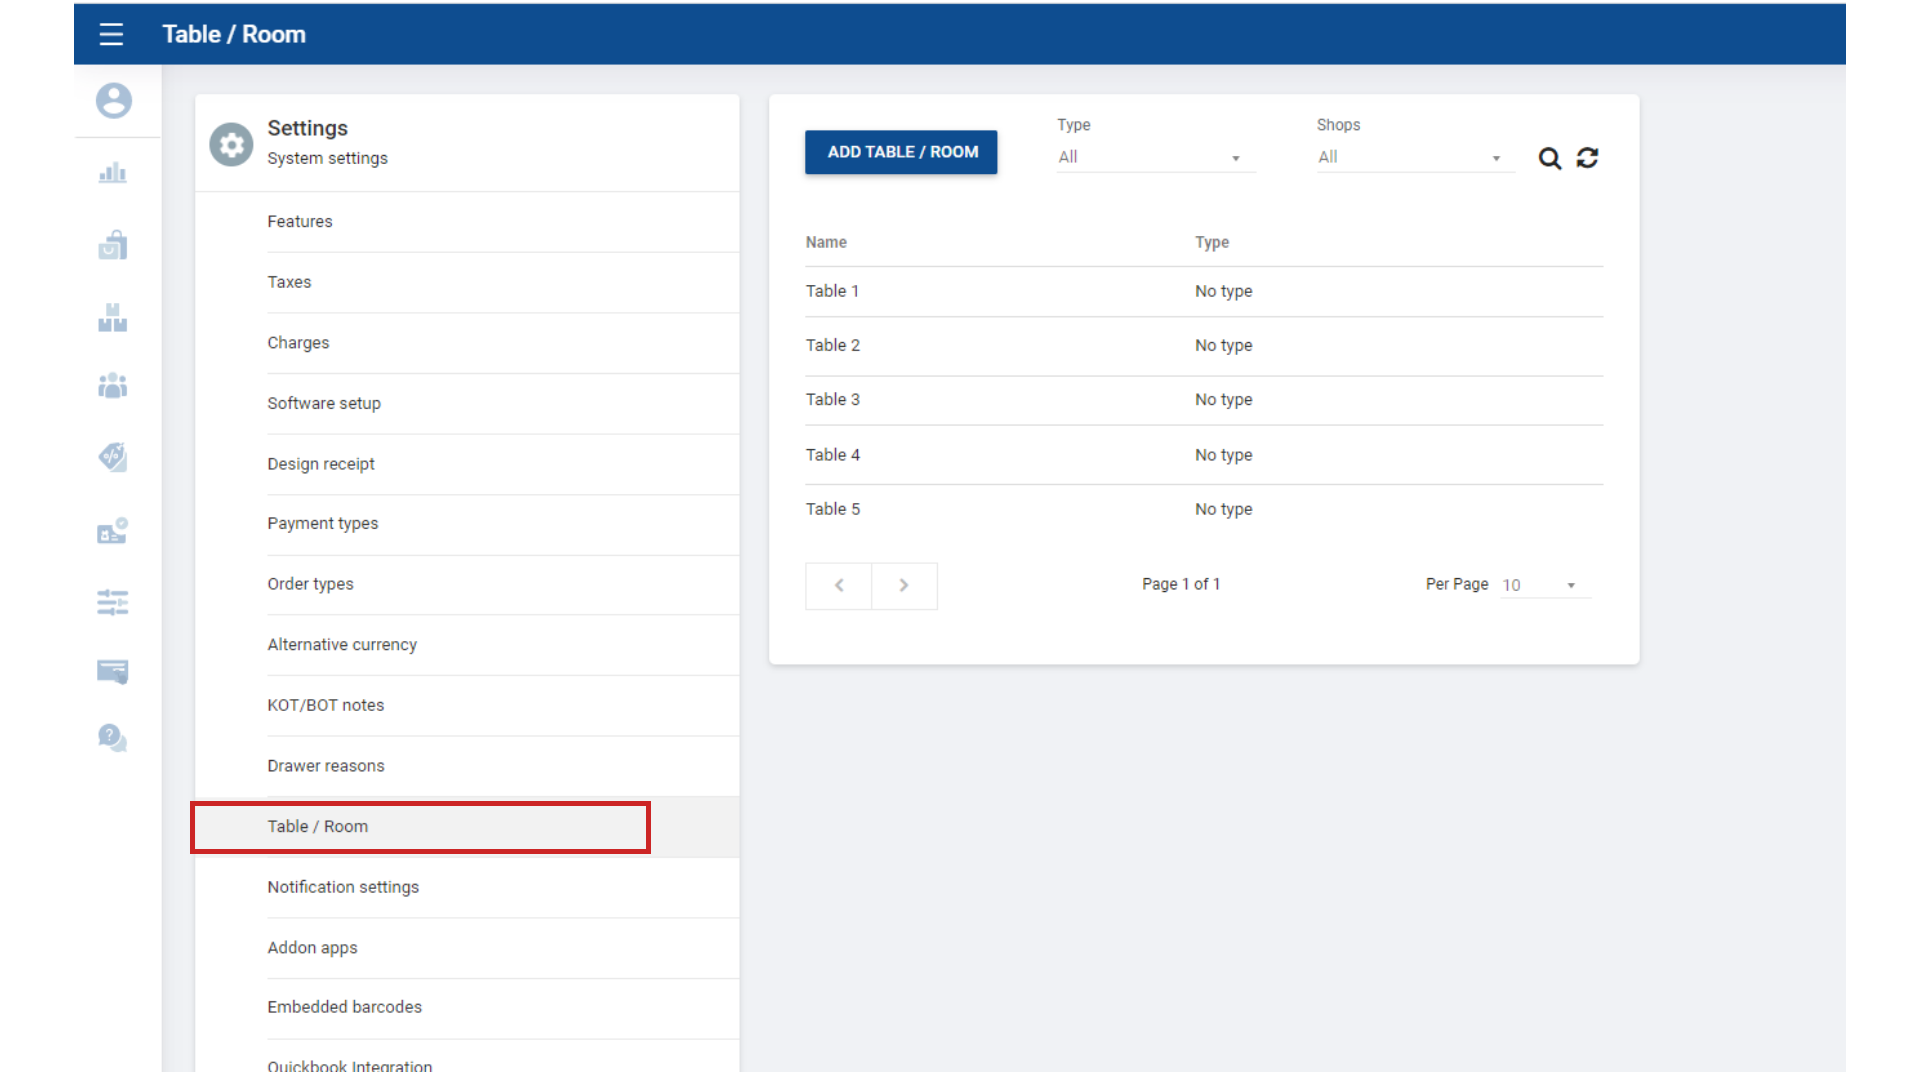
- Select “Table / Room”
- Click “Add Table / Room”
4. Enter Table Details
- Enter name and type
- Click ‘Save’
Saved tables appear in POS App under the “Table” icon.
5. Table Status & New Layout
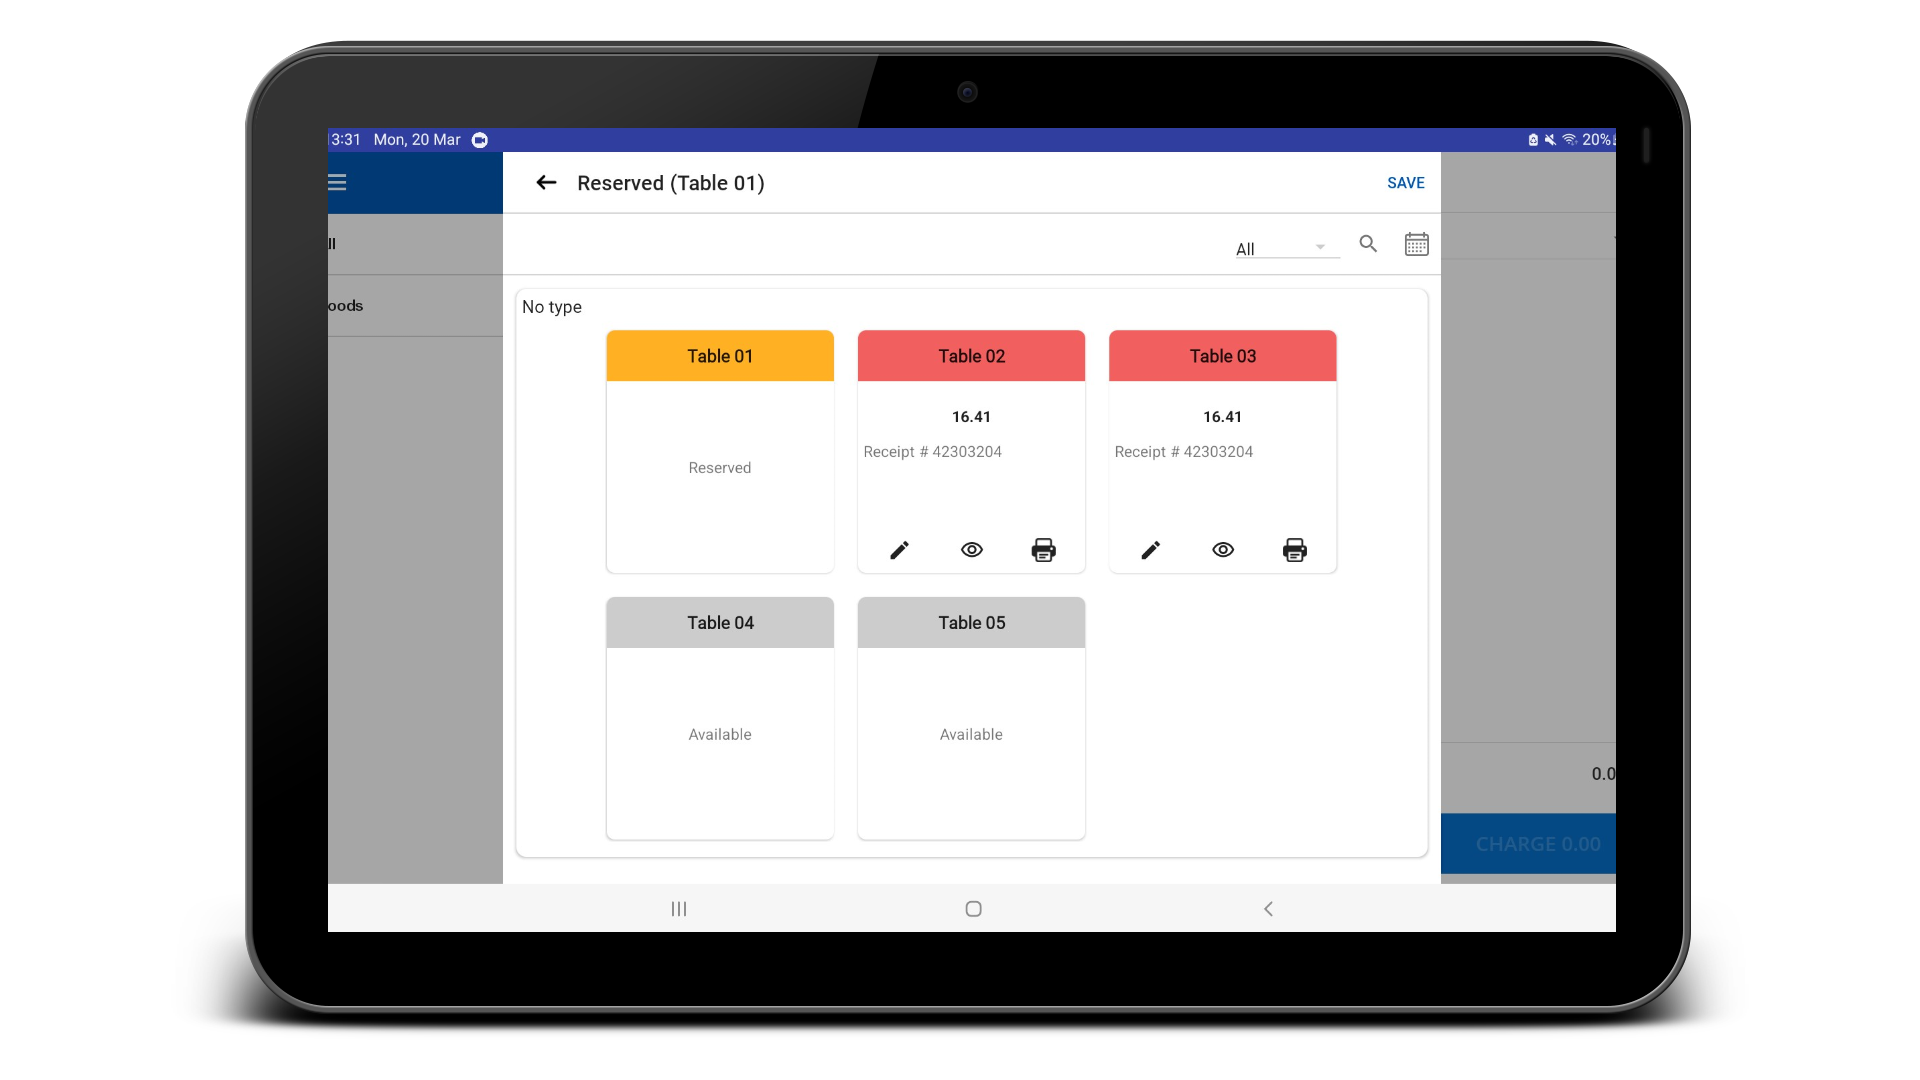
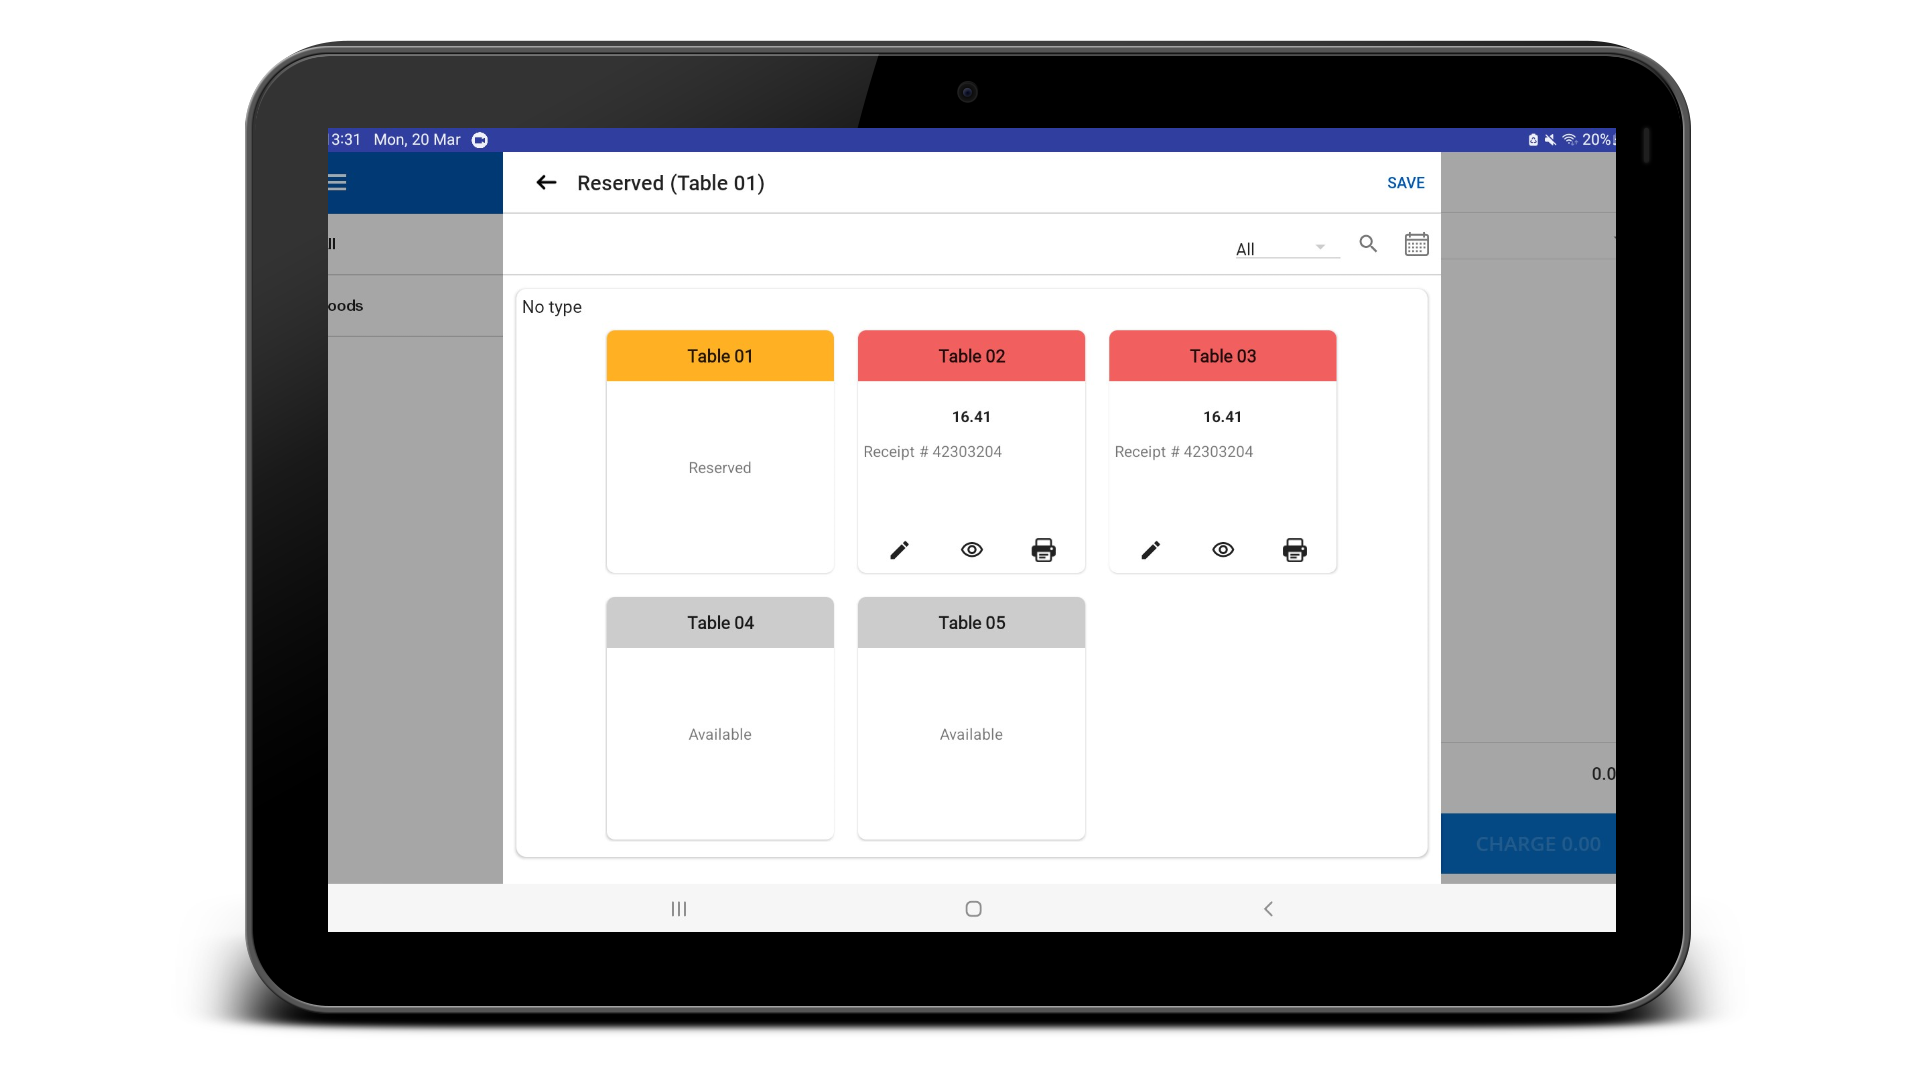
The table status colors:
- White – Available
- Red – Occupied
- Yellow – Reserved
Users can add multiple tables while billing, assign orders by selecting table number/name, view orders per table, and settle bills individually or generate a pre-bill.
6. Reserve Tables/Rooms
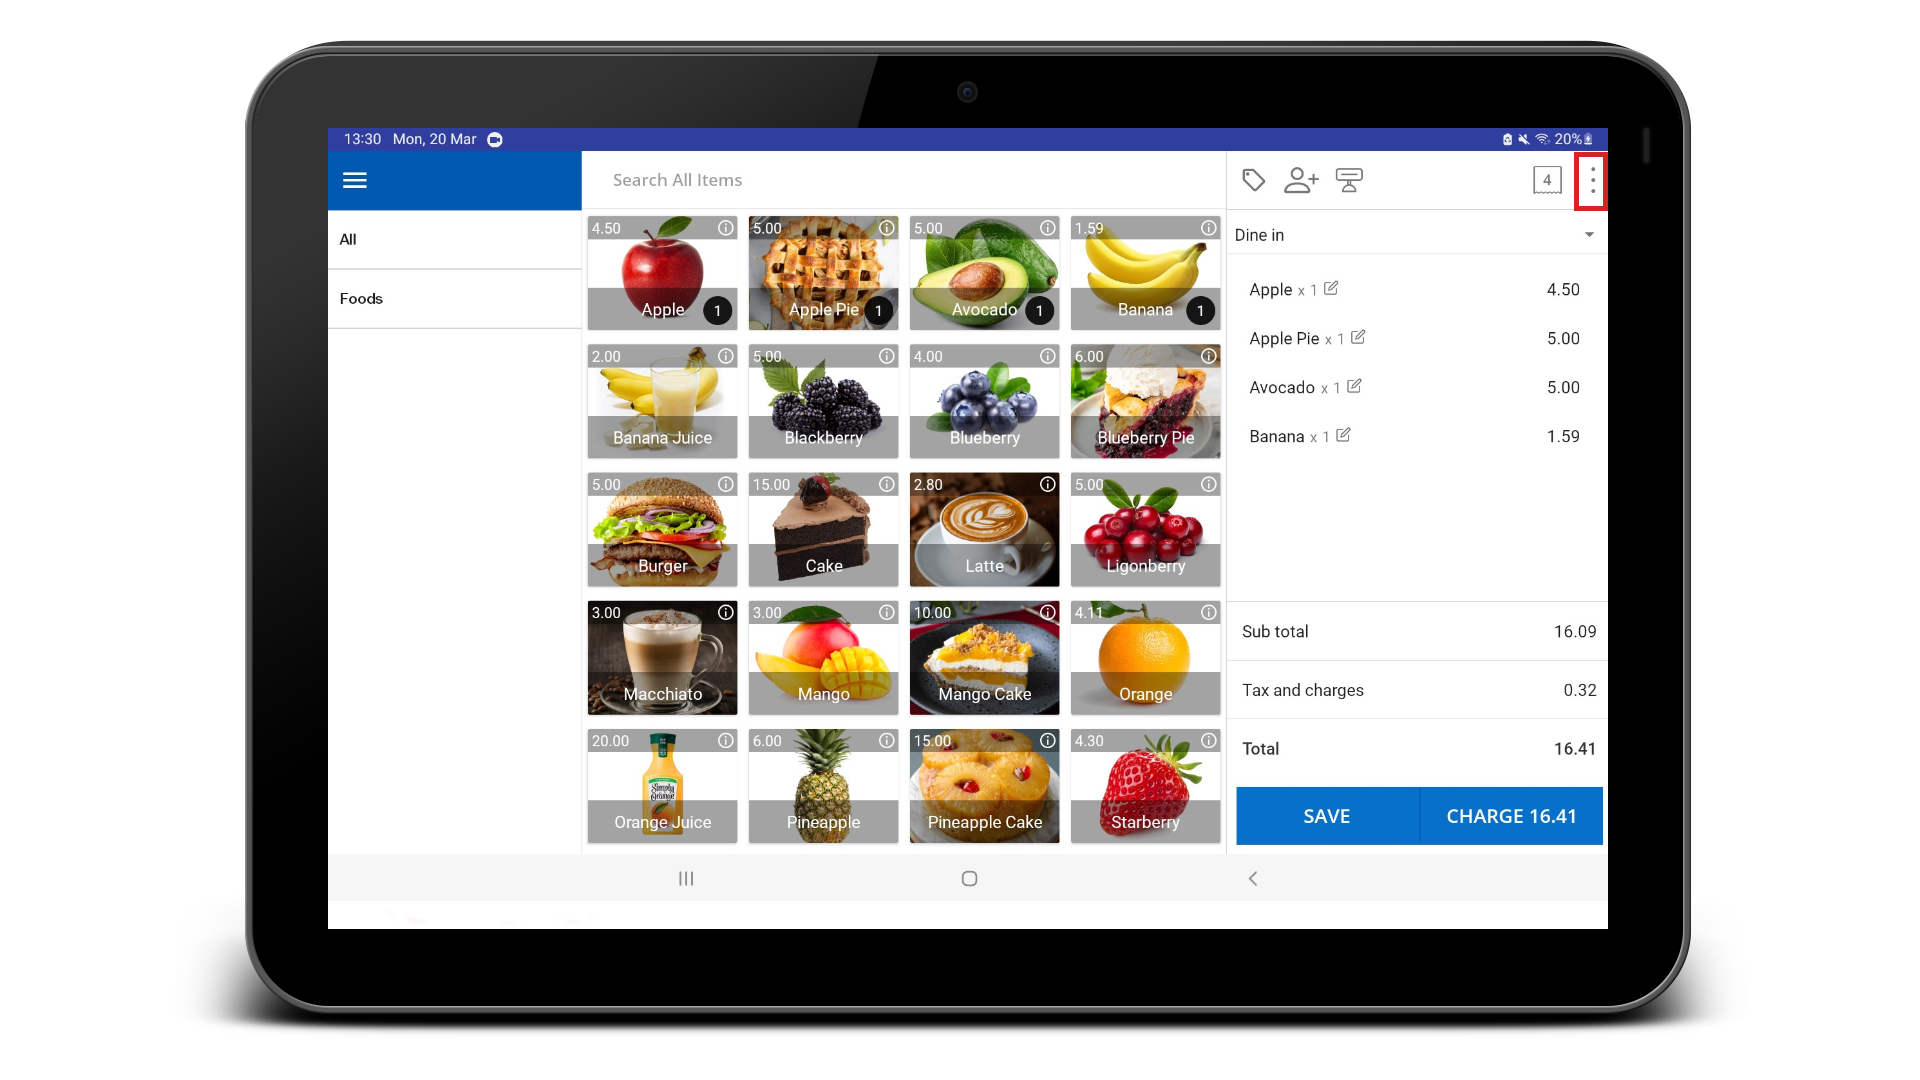
- Select the product(s)
- Click the three-dot button in the top-right corner
- Select ‘Table / Room’
7. Select Available Tables / Rooms
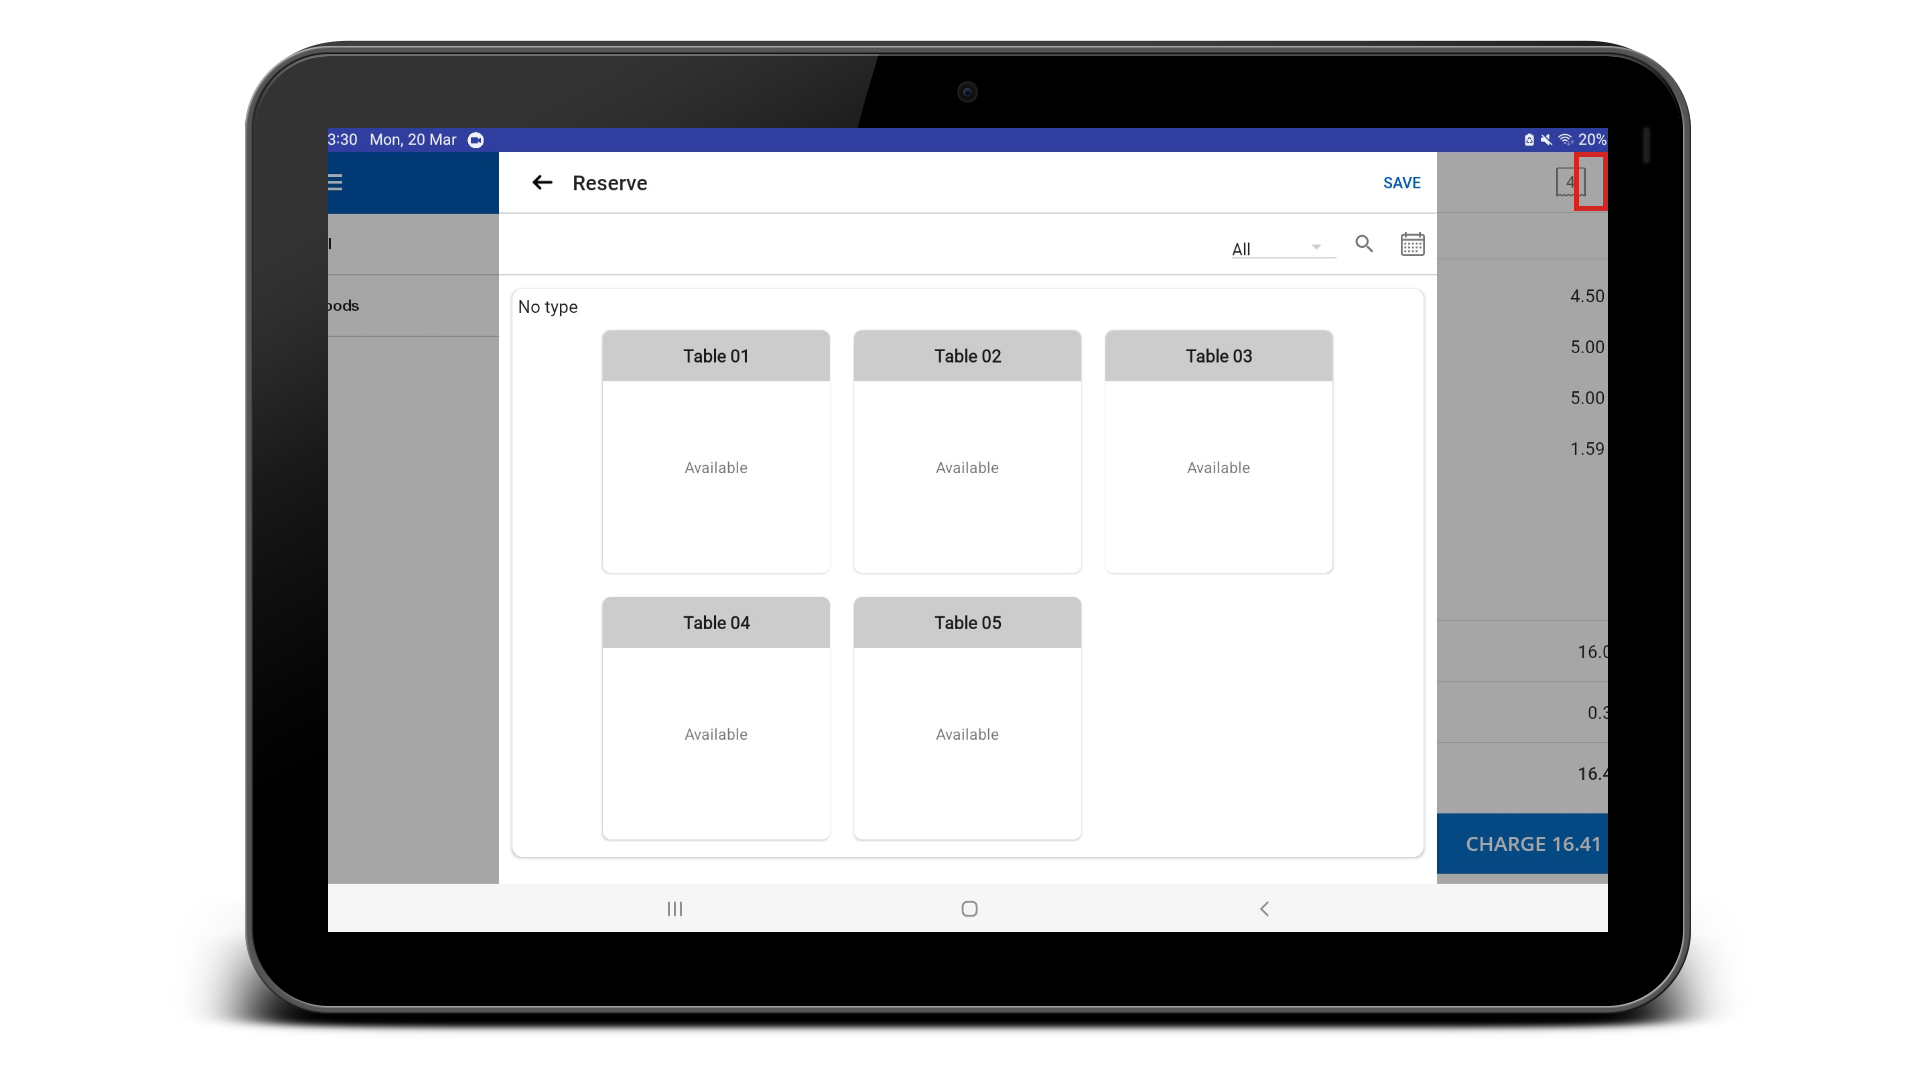
- View available tables/rooms
- Select required table(s)
- Selected table turns orange
- Save changes
8. Click ‘Reserve’
- Click ‘Reserve’
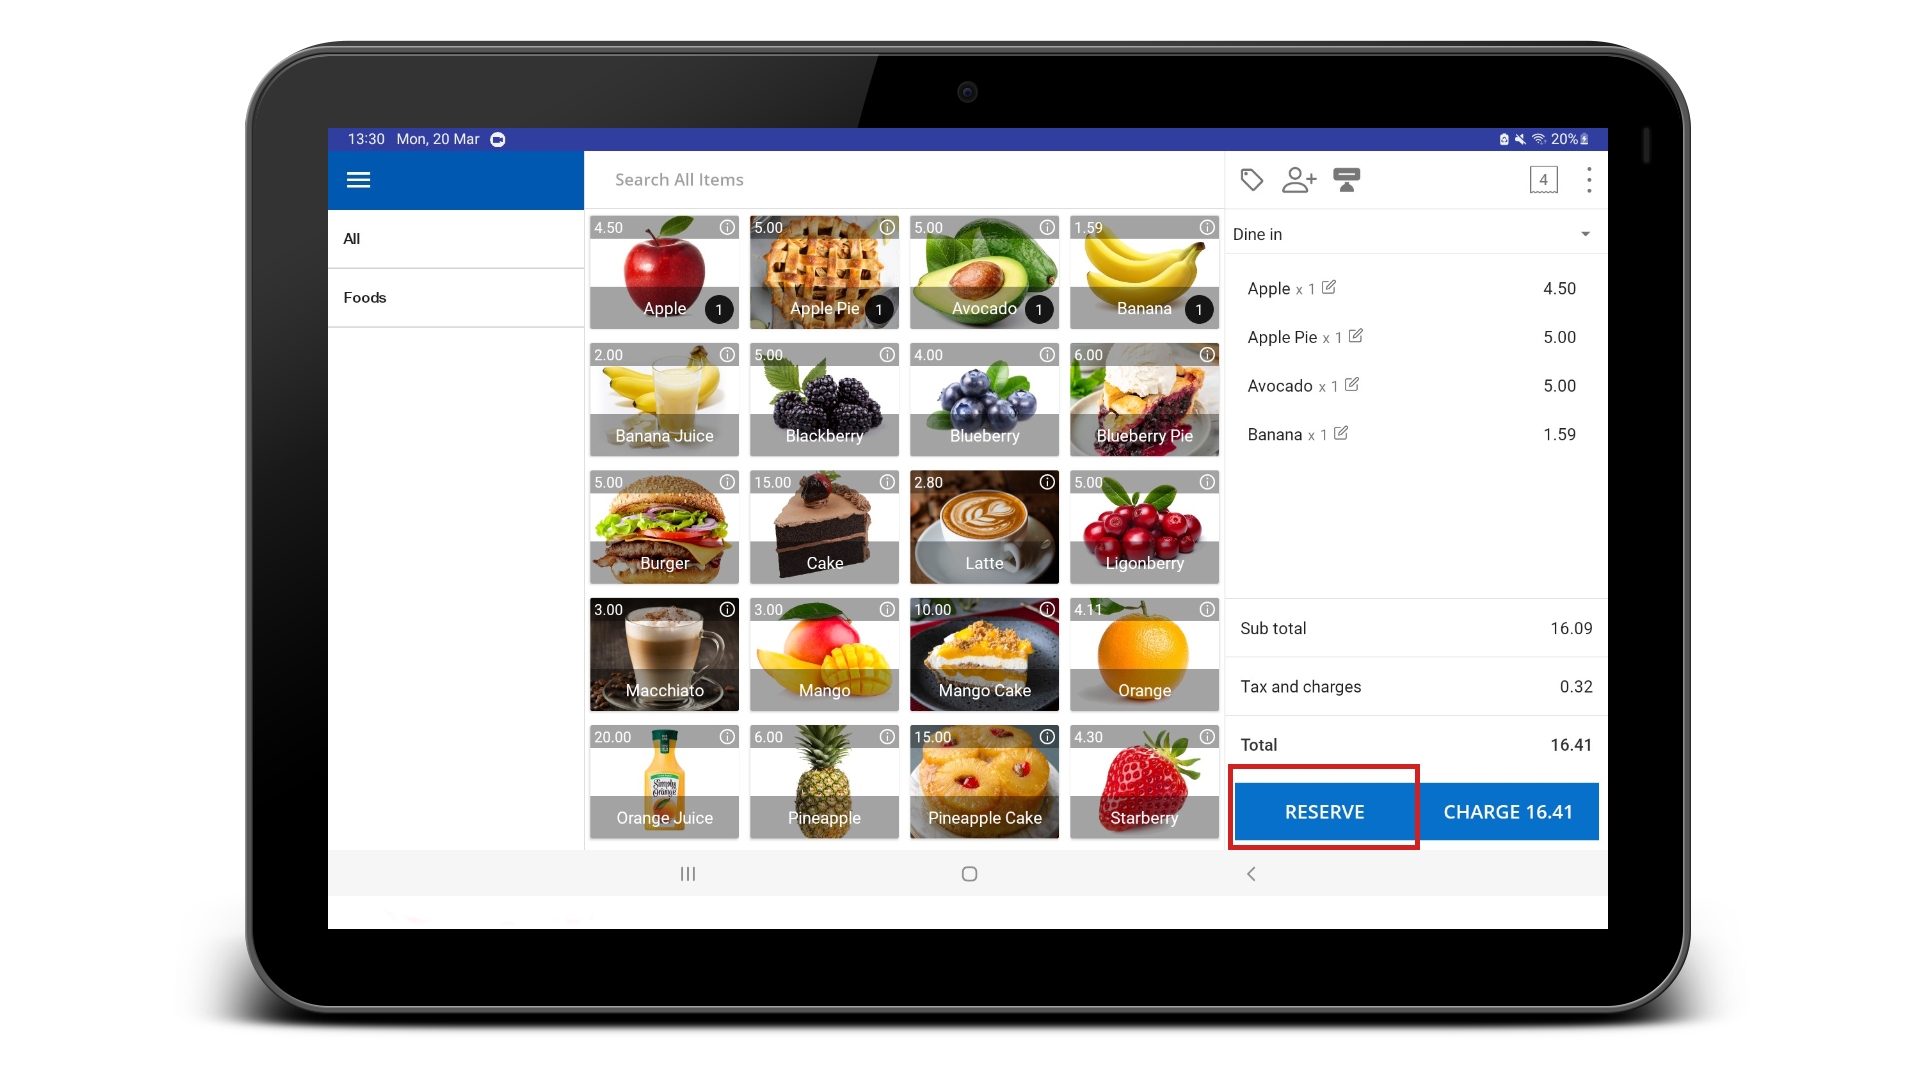
9. Save Bill with Description
- Save the bill with a description if needed
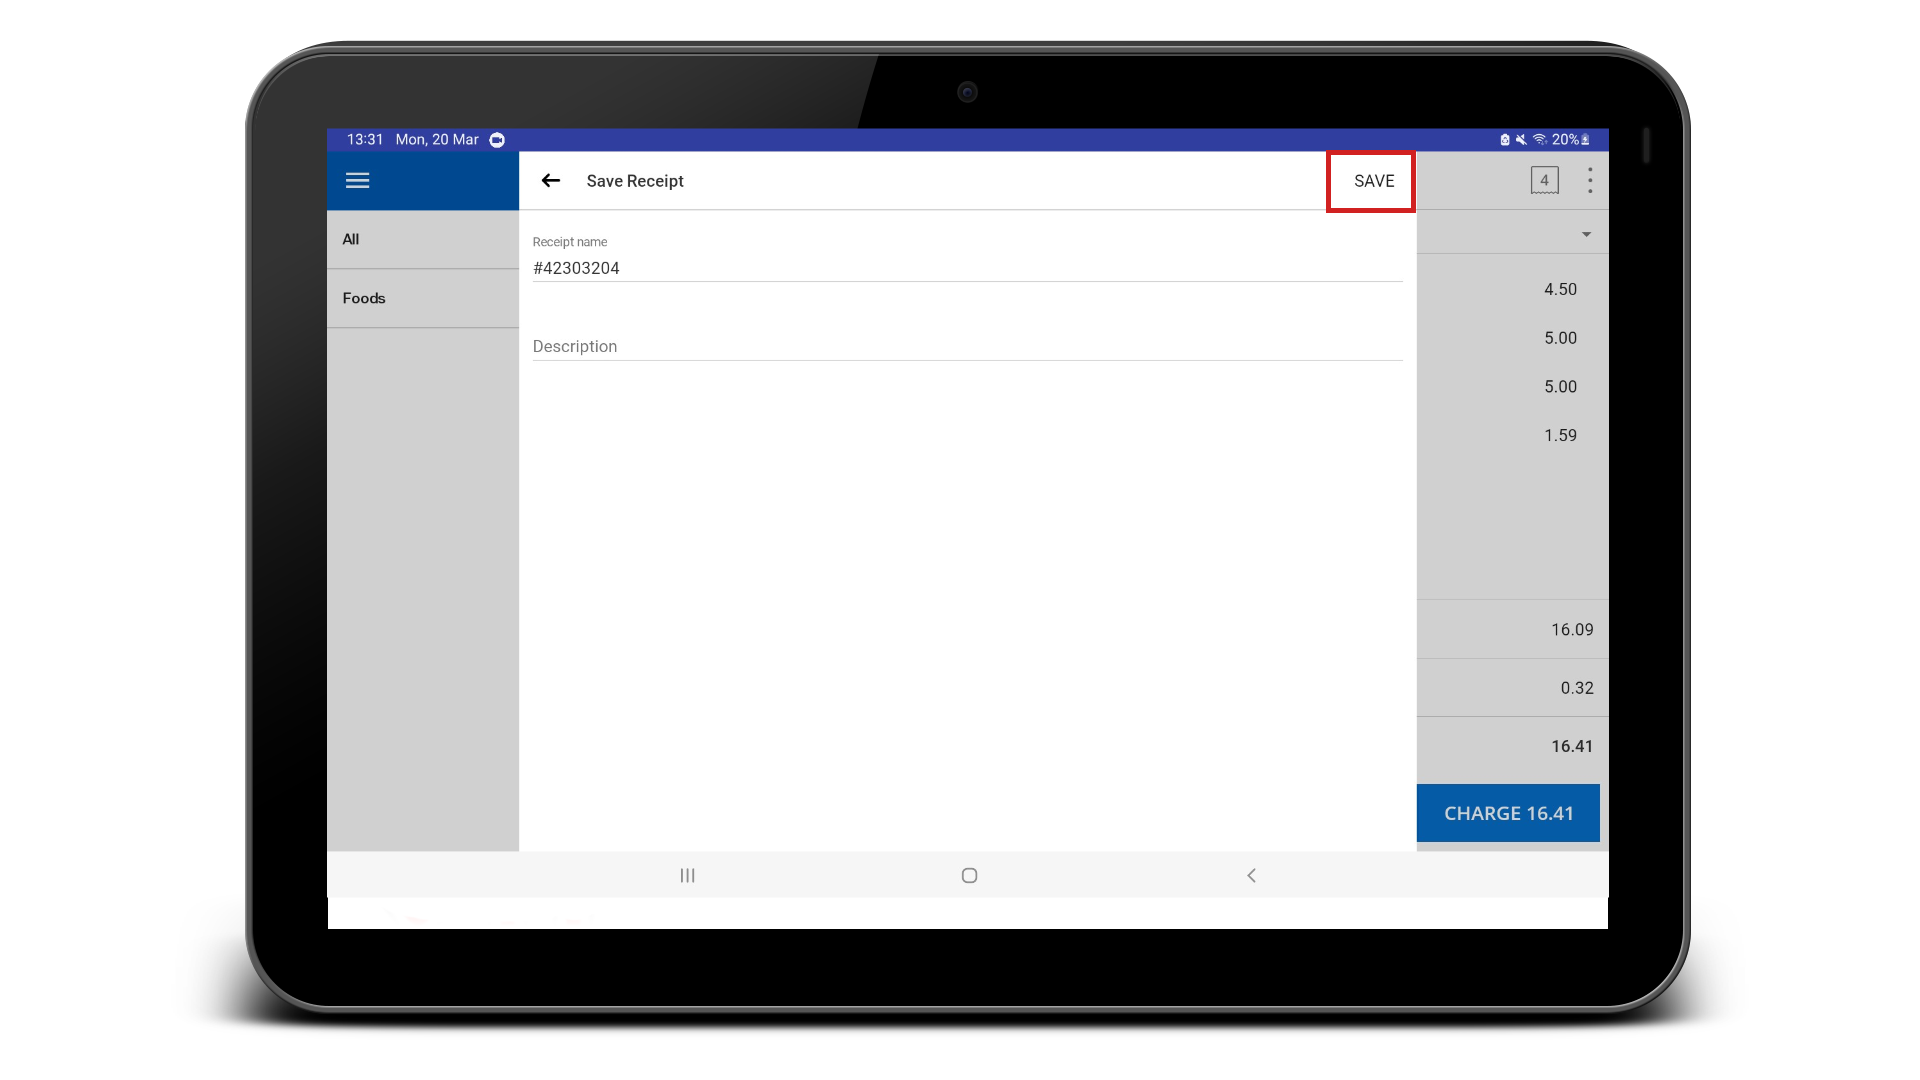
10. Assign Staff to Tables / Rooms & Update Receipts
- To update receipts (add products):
- Click the three-dot button
- Select ‘Tables / Rooms’
- Select the reserved table (red) to update
11. Assign Staff to Tables / Rooms
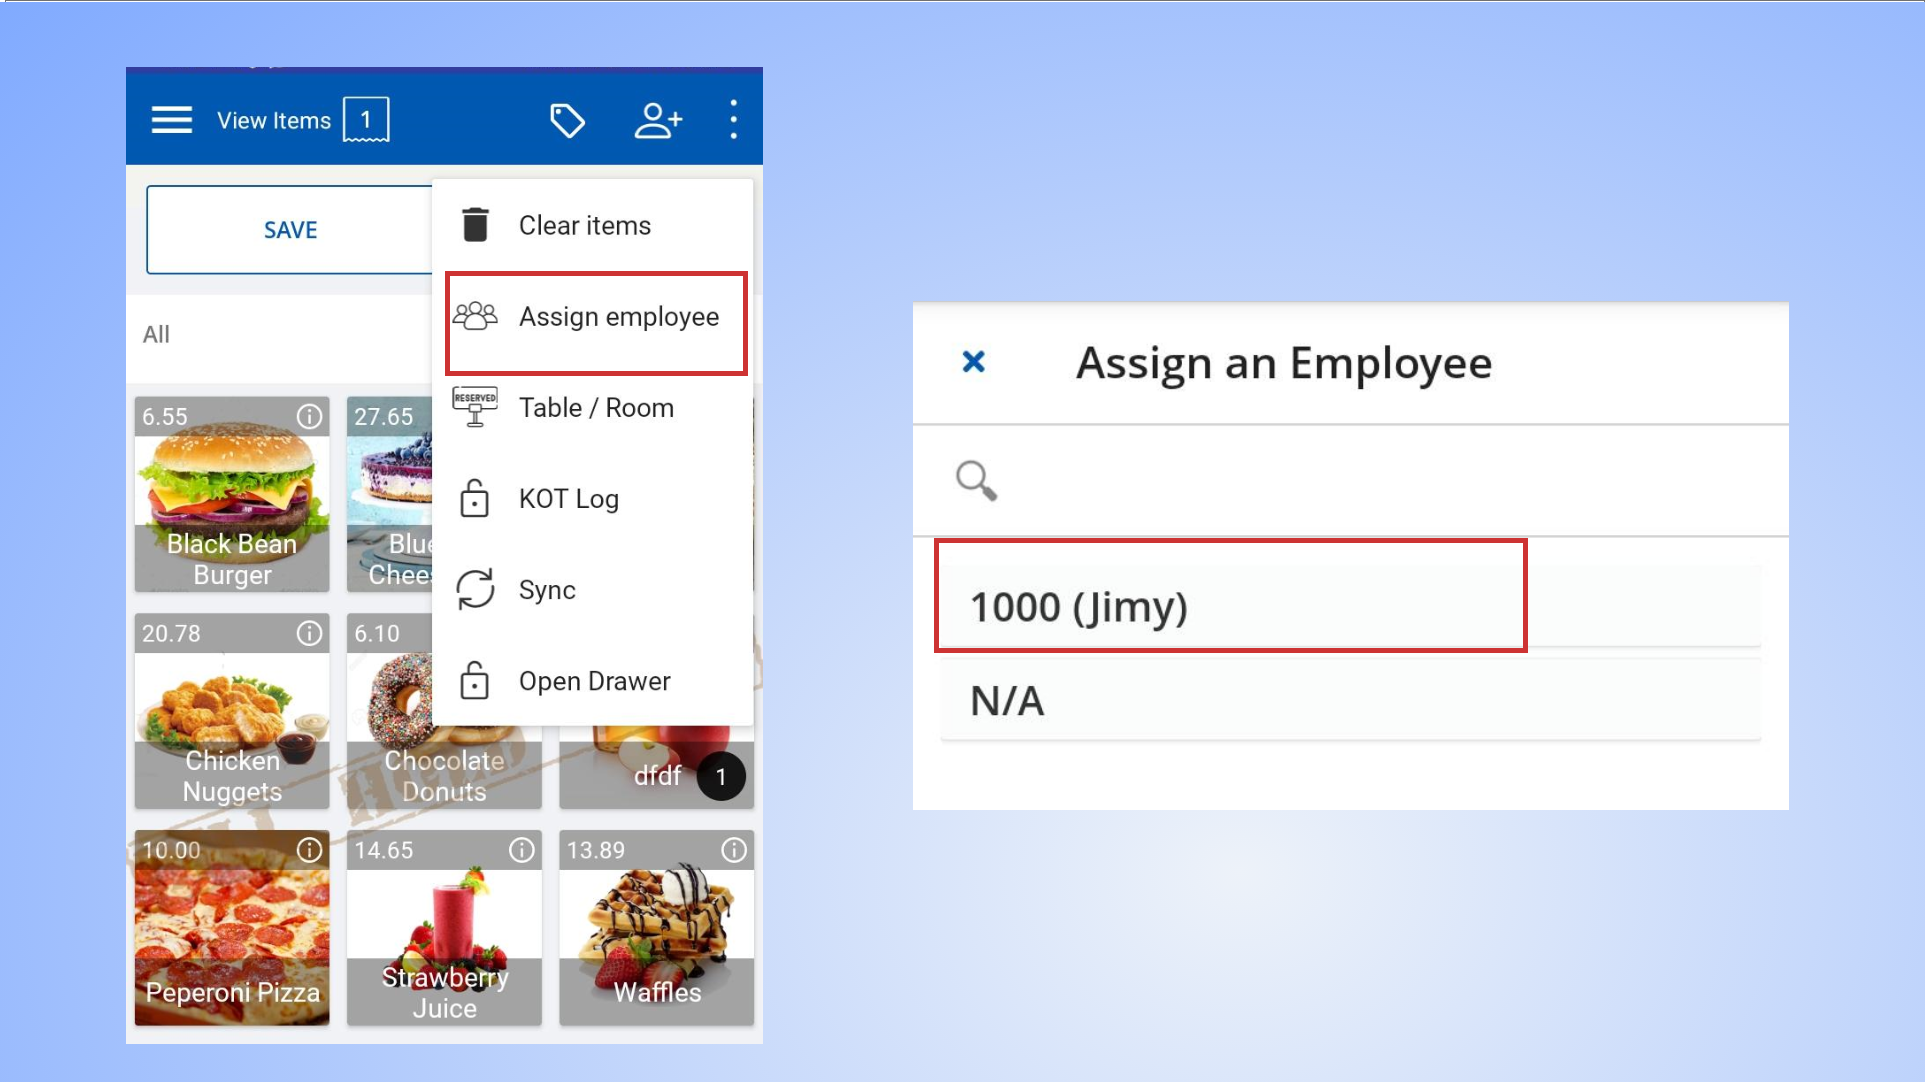
To assign employees, first create ‘Other staff’ in Back Office. Instructions: How to Create Other Staff
- Click the three-dot button and select ‘Assign employee’
- Select the employee name