Special Note
-
As part of the restructuring process, the Product-wise Discount plan options are now accessible within the item customization dialog, while Receipt-wise Discount plans are under a discount icon in the main receipt interface.
-
You can toggle these discounts on or off as needed.
Steps to Create a Discount Plan
1. Login to SalesPlay POS Back Office
-
Select ‘Promotions’ from the main menu.
-
Go to ‘Discounts’.

2. Click ‘CREATE DISCOUNT PLAN’

3. Type the Discount Plan Name

4. Select the Shop

5. Select the Discount Attachment Method

6. Select Discount Type (Value / Percentage)
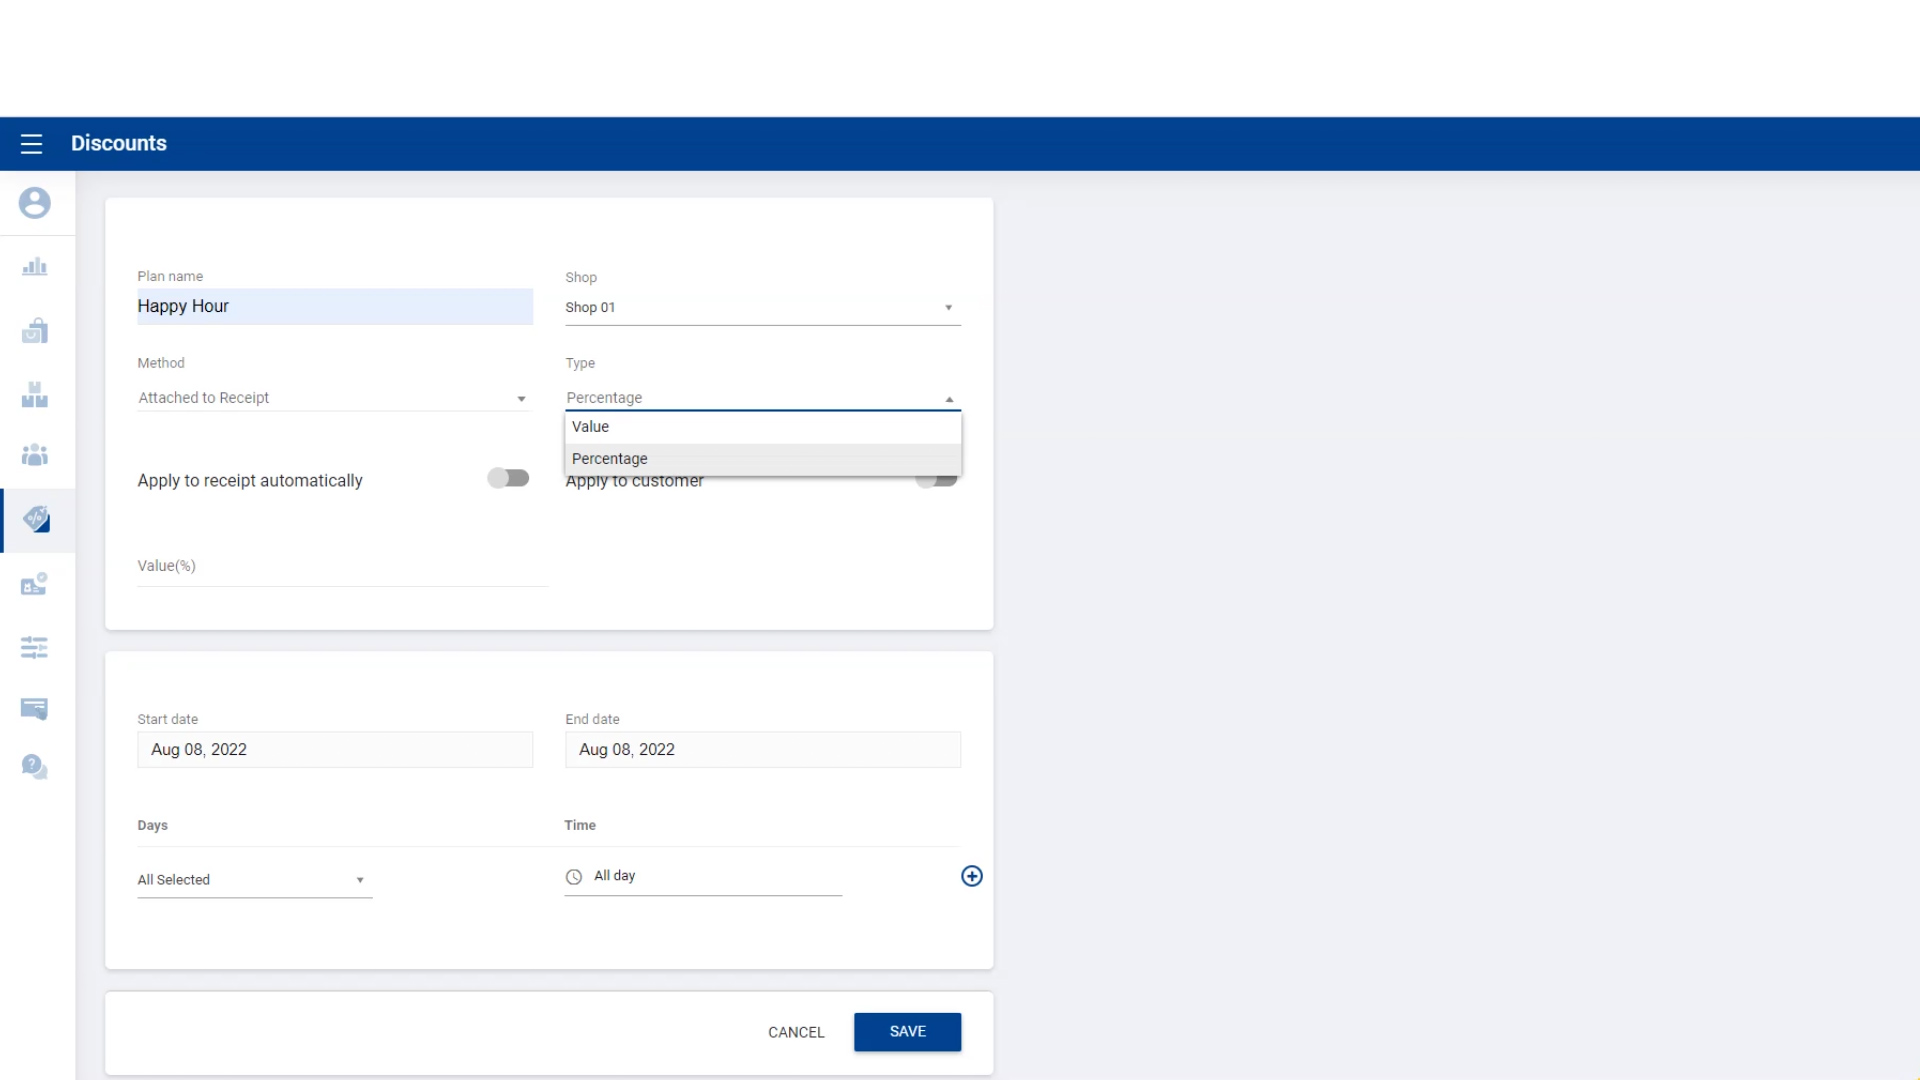
7. Enter the Percentage Value
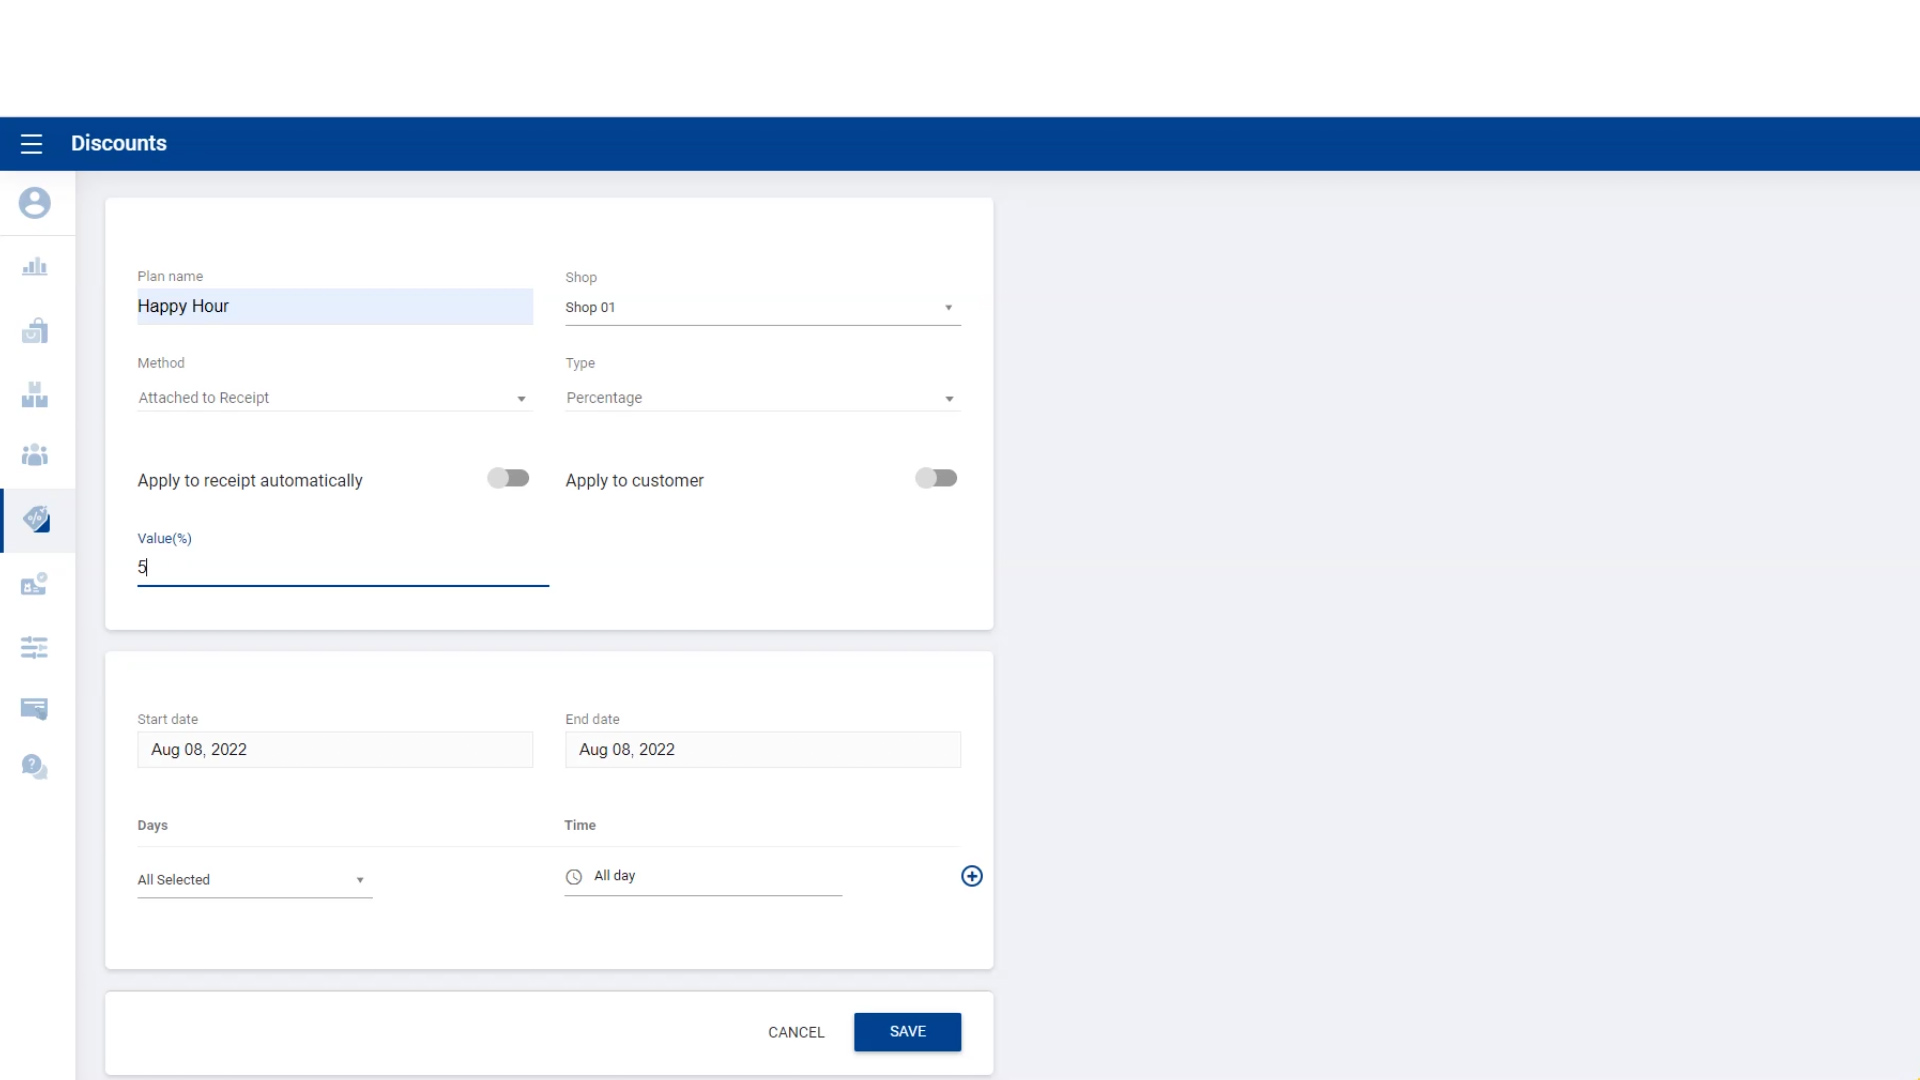
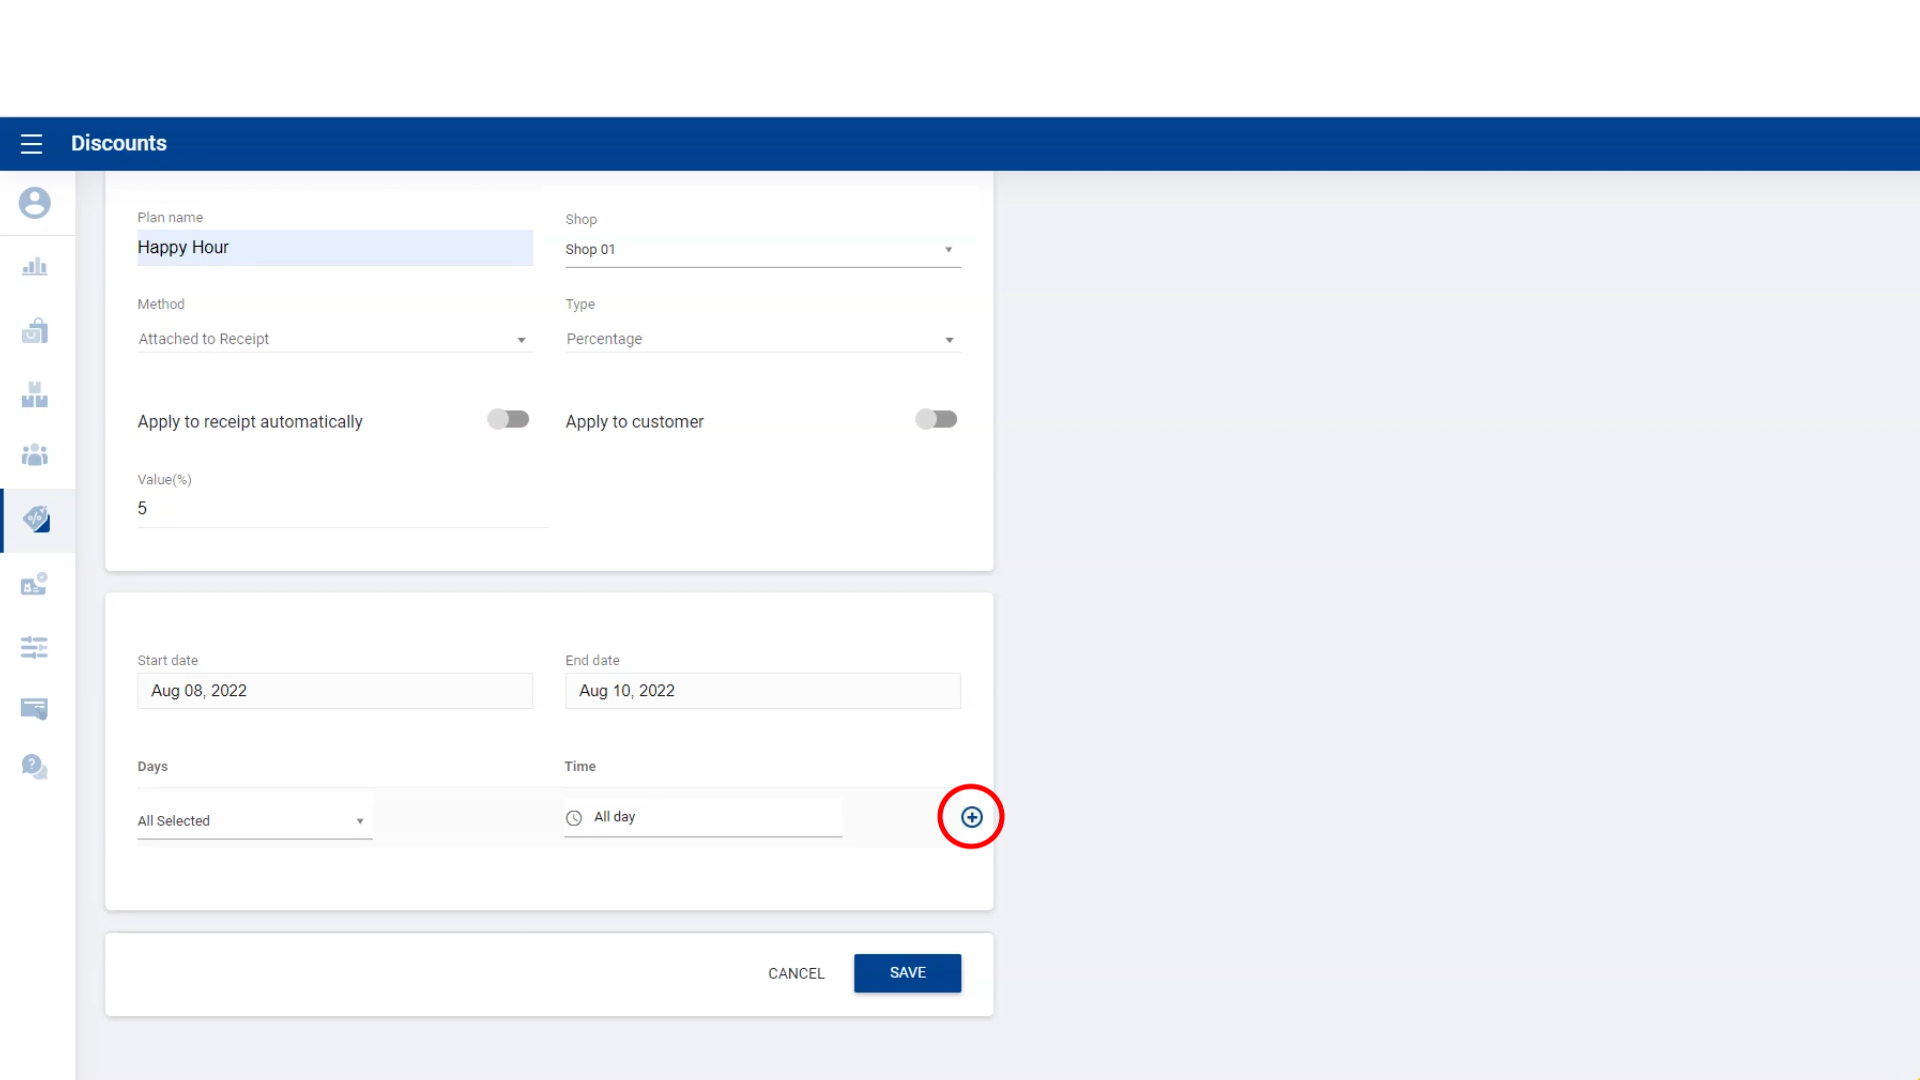
8. Select Discount Start Date and End Date

9. Select Days of the Week for Discount

10. Select Time of Day for Discount
11. Click ‘Add Button’ before saving
-
Then click ‘Save’.
12. Discount Plan Saved Successfully
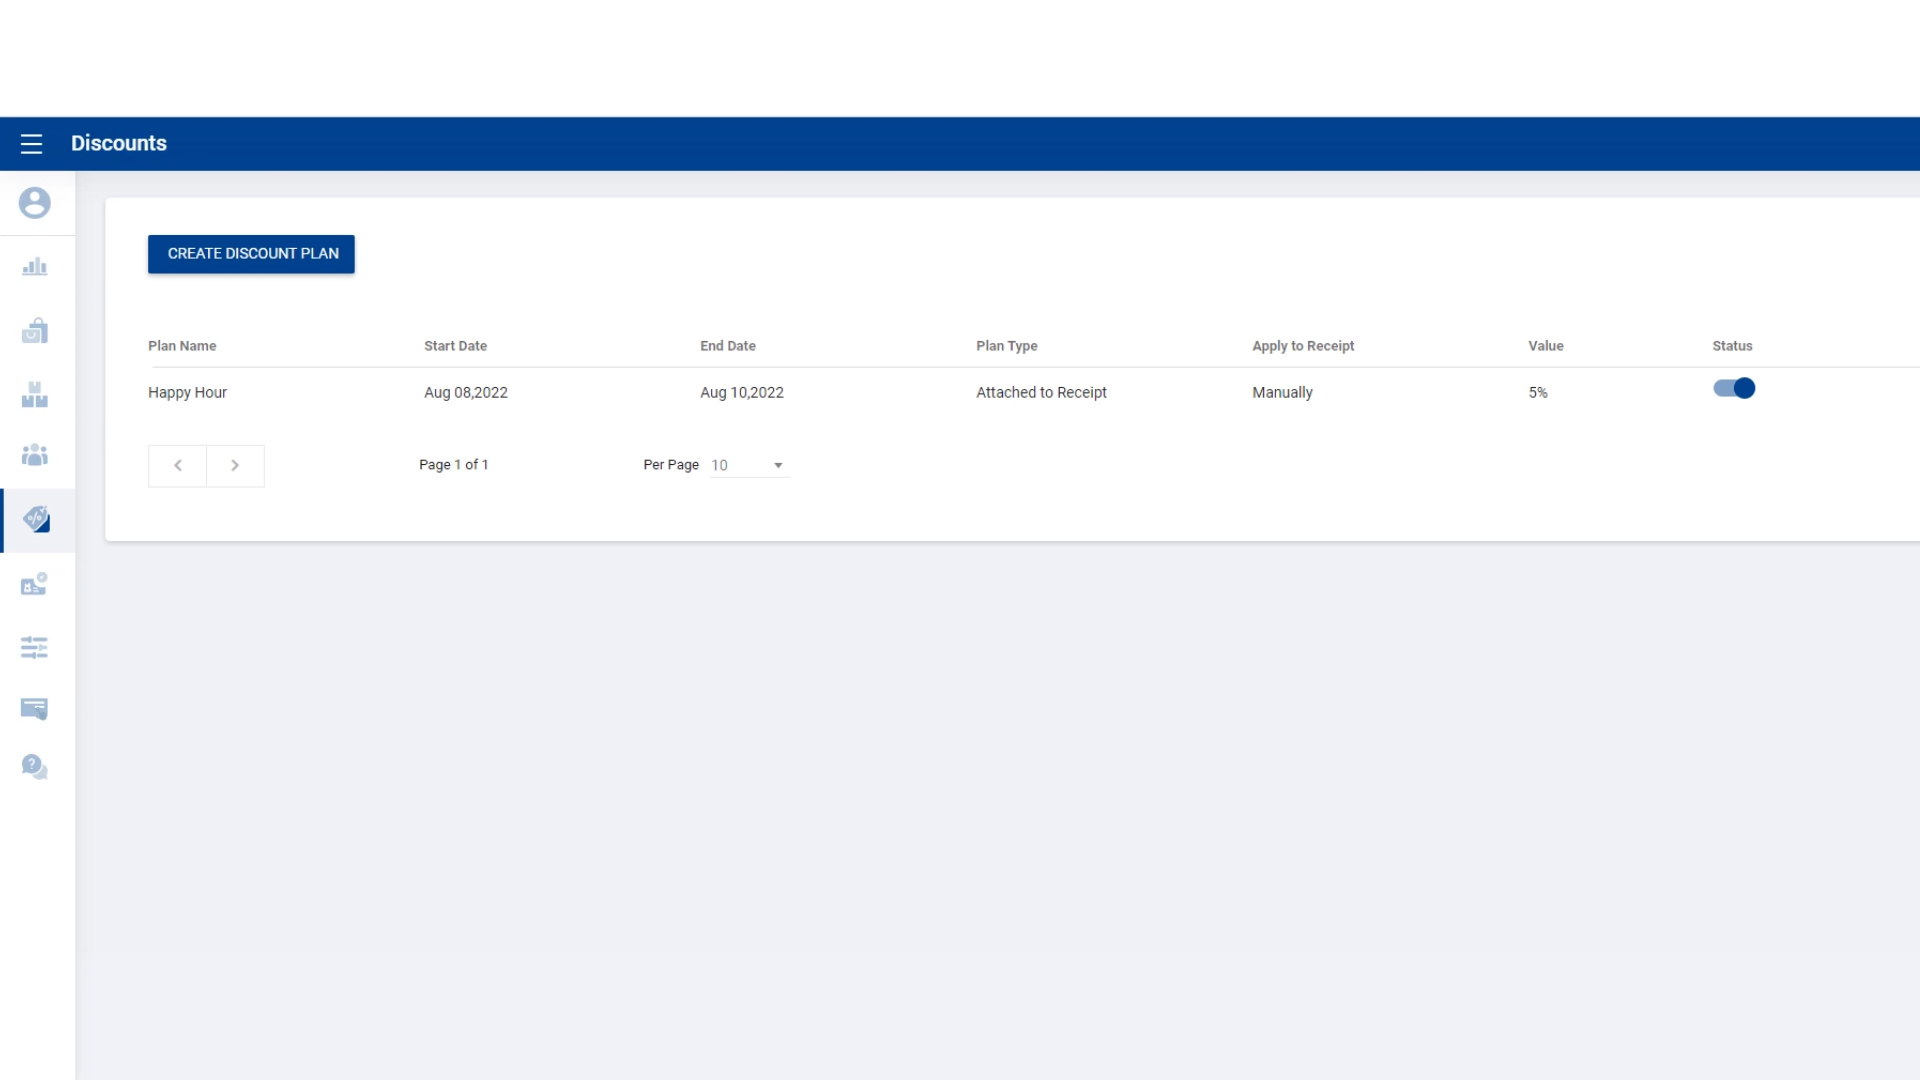
Adding Discounts to Receipts Manually
-
Add products to the cart.
-
Click the ‘Discount Button’.
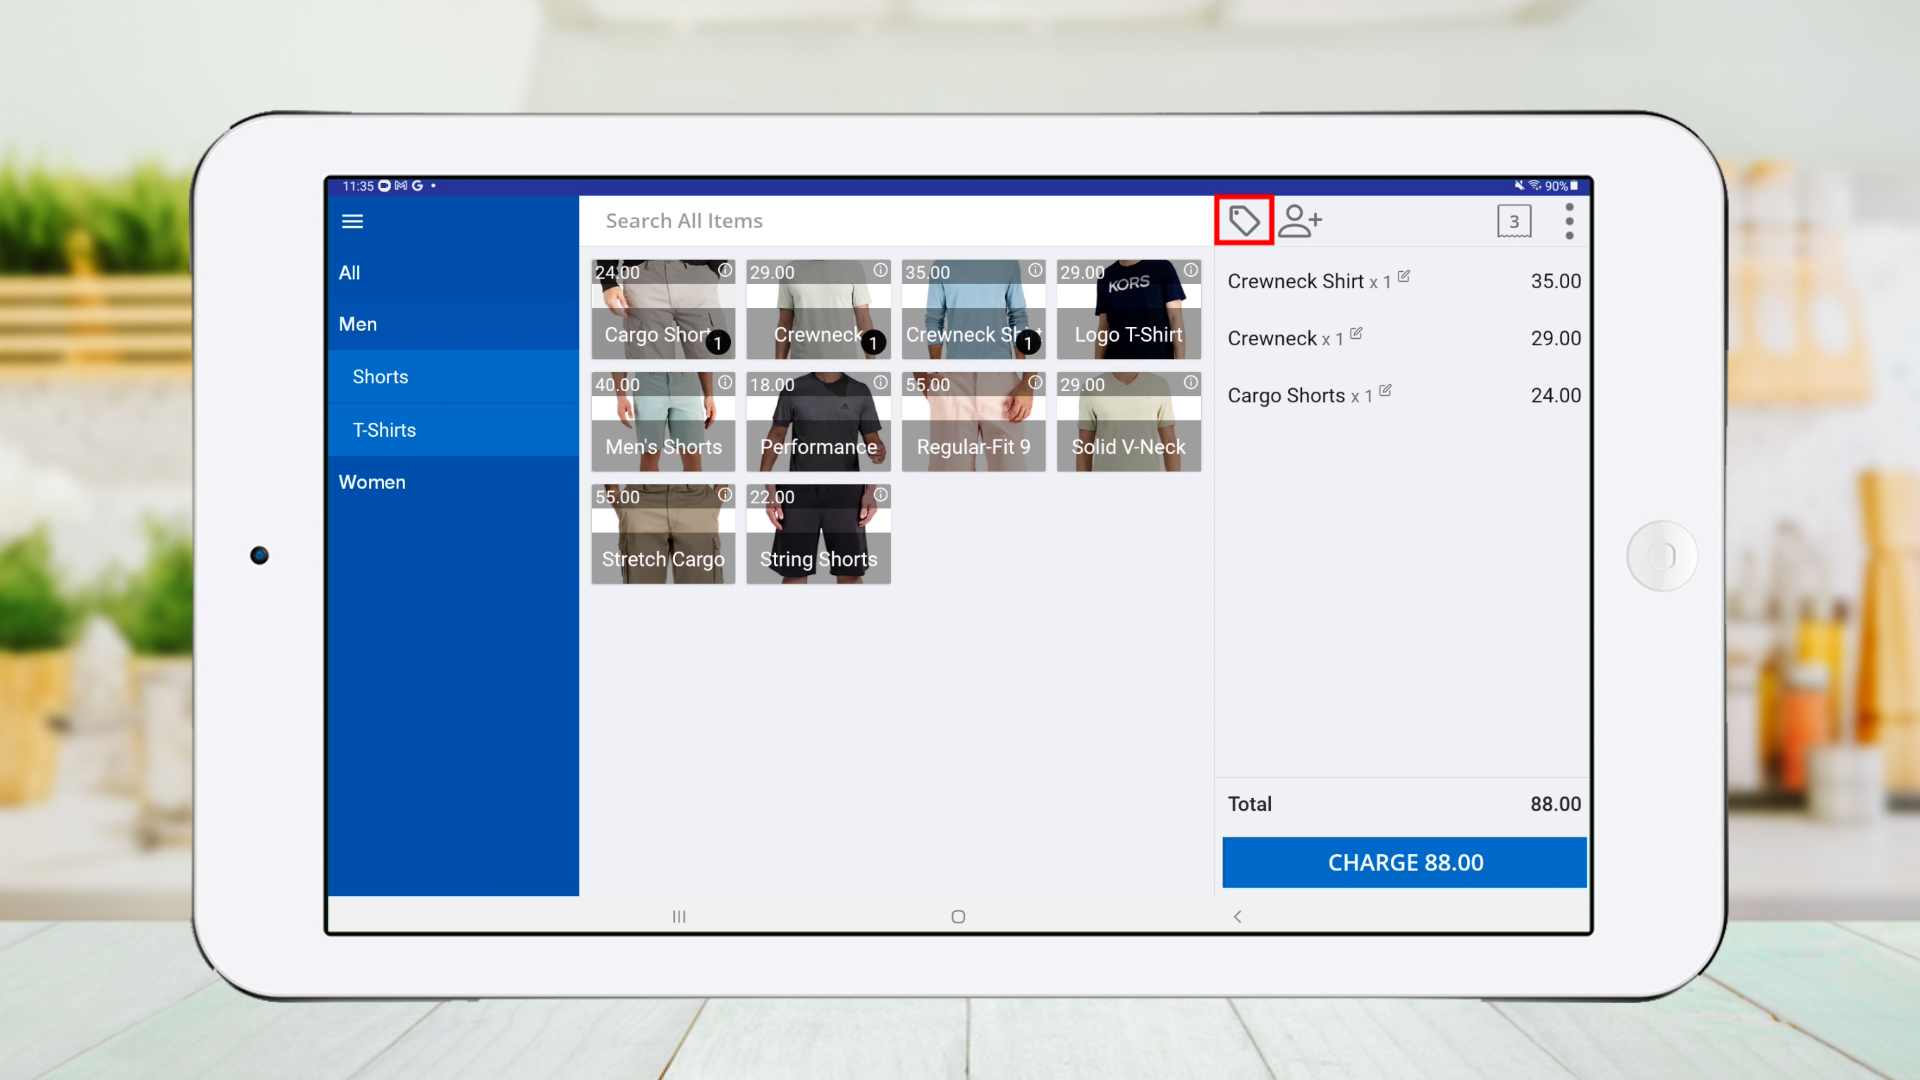
1. Select Discount Plan
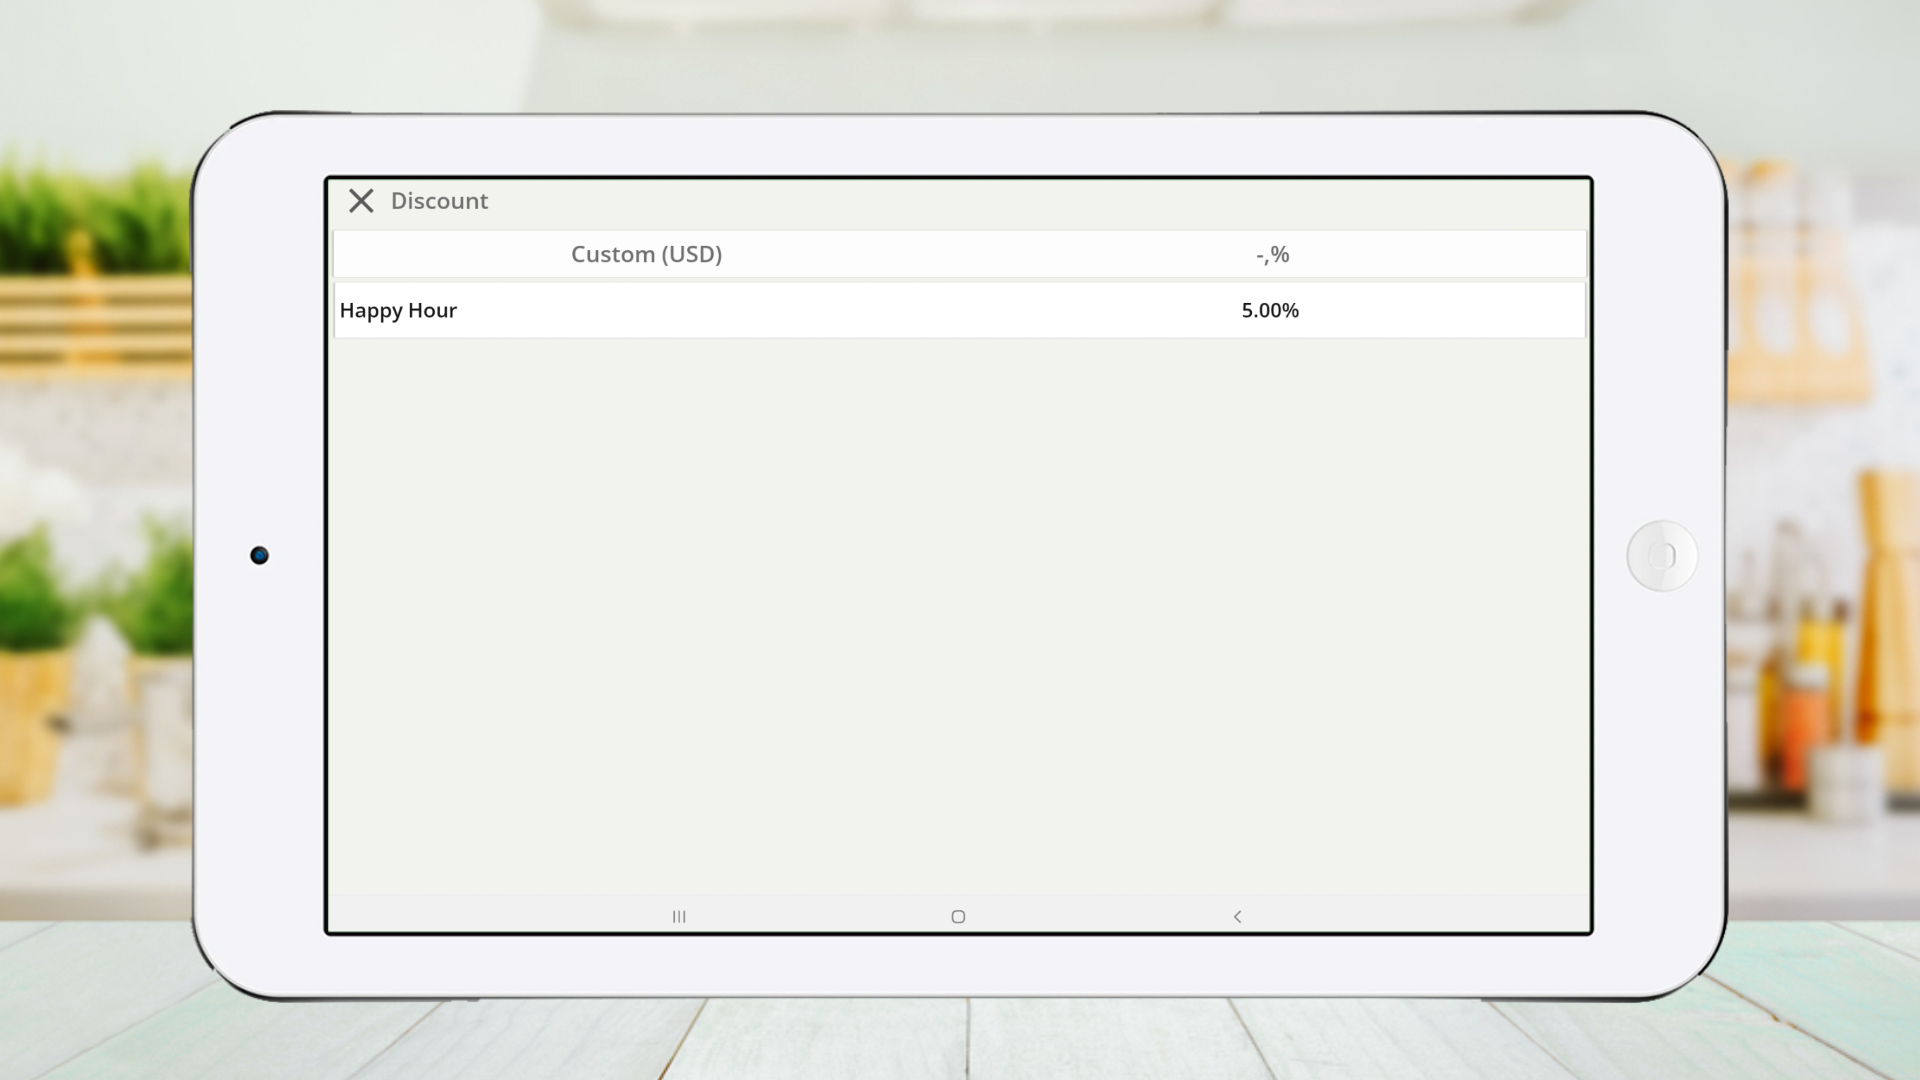
2. Click ‘CHARGE’
-
Discount is successfully added to the receipt.

Automatic Discount Application
-
Click on the Existing Plan

-
Enable ‘Apply to receipt automatically’ and click ‘SAVE’

-
Add products to the cart.
-
Discount will be automatically applied.

-
Click ‘CHARGE’
-
Discount appears on the receipt successfully.

This format keeps your step-by-step structure, images, and video, while improving readability and organization for your users.